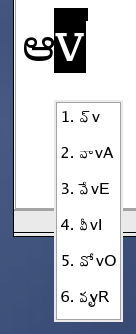
Telugu RTS with IIIMF
Please note that future development of this work (including Telugu RTS for SCIM) can be found at the Swecha localization project’s wiki and also at Wikipedia. Also, this article was originally written during the fall of 2004.
Motivation
For several months, I had been using the Yudit program’s Roman-to-Indic transliteration engine, which is based upon the Rice Transliteration Standard (RTS) for writing text in Telugu. I often wondered, “Wouldn’t it be great if such functionality existed in all programs?”
Luckily, I soon found out about the existence of exactly such capability, via the Internet Intranet Input Method Framework (IIIMF) Unicode Table (UNIT) Language Engine (LE), from the Fedora Core release notes. Whilst investigating the IIIMF website, I found some screenshots and was immediately impressed!
However, when I went to try out the IIIMF UNIT LE in person, I was disappointed to find that the existing Telugu IIIMF code-table merely re- mapped the keyboard according to the INSCRIPT specification. Frustrated and empowered to add transliteration support for Telugu, I adapted the RTS key-map from Yudit into a code-table usable by the IIIMF. I have submitted the code-table to the IIIMF UNIT LE group where it is currently under review.
Screenshots
See the screenshots I had captured on my system
See the official IIIMF screenshot gallery
Files
Download the Telugu RTS code-table for the IIIMF UNIT LE.
Download OpenType Indic fonts provided by IndLinux.
Resources
See the IIIMF UNIT LE documentation for writing your own code-table.
See the official Fedora IIIMF FAQ for configuring your IIIMF client (GIMLET).
See the unofficial Fedora FAQ for configuring the yum utility.
See బాగుంది.కాం’s tutorial on RTS transliteration. Note that some combinations presented there do not follow the RTS.
See the original RTS specification, which was written back in 1992, for a tutorial on Telugu RTS.
See the official International Institute of Information Technology (IIIT) Hyderabad, Language Technology Resource Centre (LTRC) online services for Indian dictionaries.
Installation
The following instructions pertain mostly to the Fedora Core GNU/Linux distribution. However, the process should be quite similar on all GNU/Linux distributions.
Before we get started, install the necessary IIIMF packages as the super user (root):
yum install 'iiimf**'
Path to the UNIT LE
The $UNIT variable will be used to keep track of the path to your UNIT LE
installation.
If you are using Fedora Core 3, then execute:
UNIT=/usr/lib/im/locale/UNITIf you are using Fedora Core 4, then execute:
UNIT=/usr/lib/iiim/le/unitleIf you are using a different GNU/Linux distribution and know where your UNIT LE installation resides, simply point the $UNIT variable to the path of your UNIT LE installation. Otherwise, try execute the following and see if it uncovers the path to your UNIT LE installation:
find /usr -name txt2bin -type f -print 2>/dev/null | sed 's/common.**$//'
Path to fonts
The $FONT variable will be used to keep track of the path to your X
server’s fonts directory.
If you want to install fonts globally and are using Fedora Core 3 or 4, then execute:
FONT=/usr/lib/X11/fonts/indicIf you want to install fonts to your home directory, then execute:
FONT=~/.fonts
Installation procedure
Download the Indic fonts and extract them into $FONT. Note that you do not need to be logged-in as root for this part if you are installing fonts into your home directory.
mkdir $FONT
tar -vzxf indic-otf-0.2.tar.gz
cp -iv indic/OpenType/**ttf $FONT
mkfontscale $FONT
mkfontdir $FONT
Download the Telugu RTS code-table and convert it into a binary format using the txt2bin utility:
$UNIT/common/txt2bin telugu_rts.utf telugu_rts.dataAs the super user (root), copy the binary code-table file into the IIIMF UNIT locale directory:
cp telugu_rts.data $UNIT/TELUGU/data/As the super user (root), edit the
$UNIT/sysime.cfgfile so that its “[ te_IN ]” section appears like the following.[ te_IN ] telugu_rts common/ctim.so TELUGU inscript common/ctim.so TELUGUAs the super user (root), restart the IIIMF server:
/sbin/service iiim restartExit out of your graphical desktop environment if any are currently running.
Restart the X server by pressing the Control, Alt, and Backspace keys simultaneously, or by executing the following command as the super user (root):
/sbin/telinit 3 && /sbin/telinit 5
Common problems and solutions
Enable languages in the UNIT LE
If you see no languages or only some languages listed in the “Add or Remove languages” window of the GIMLET client program, then the following will be of interest to you.
As noted in Fedora’s IIIMF FAQ, if you use a locale that is not associated with a certain language, and want to use IIIMF to write in that language, then run the following commands and restart the X server (see instructions above).
mkdir ~/.xinput.d
ln -s /etc/X11/xinit/xinput.d/iiimf ~/.xinput.d/default
Now you should be able to write in any language, regardless of which locale you are currently using.
Enable proper Indic font-rendering in Mozilla
As stated in the Fedora Core 3 release notes, you can enable the beautiful rendering of indic fonts in Mozilla by setting the following environment variable before running it, or by placing the following in your shell’s resource file (in my case, this file is ~/.bashrc because I use the GNU BASH shell):
export MOZ_ENABLE_PANGO=1
Kickstart the UNIT LE
In Fedora Core 3, the GIMLET client sometimes fails to enable the language in which I want to write in. The following crude procedure (alike whacking an old television set on its side when its picture is distorted) seems to make it work again, most of the time.
As root, I repeatedly jump-start the IIIMF server until it reports that it has succeeded in disabling and re-enabling itself:
# service iiim restart
Stopping IIIMF input server:  [  OK  ]
Starting IIIMF input server:  [  OK  ]
